Can Ceiling Racks Be Mounted Safely on Vaulted or Angled Garage Ceilings?
Determining whether you can ceiling racks be mounted safely on vaulted or angled garage ceilings is a common challenge for homeowners looking to optimize their storage. While standard flat-ceiling installations are straightforward, the geometry of a sloped roof introduces significant structural variables. You can achieve a secure mount, but it requires specific hardware and a precise understanding of your roof framing.
By choosing the right adapter kits and verifying the load-bearing capacity of your rafters, you can reclaim floor space without compromising safety. This article explores the technical requirements and best practices for securing overhead storage in non-standard garage environments.
The Direct Answer: Safety on Sloped Surfaces
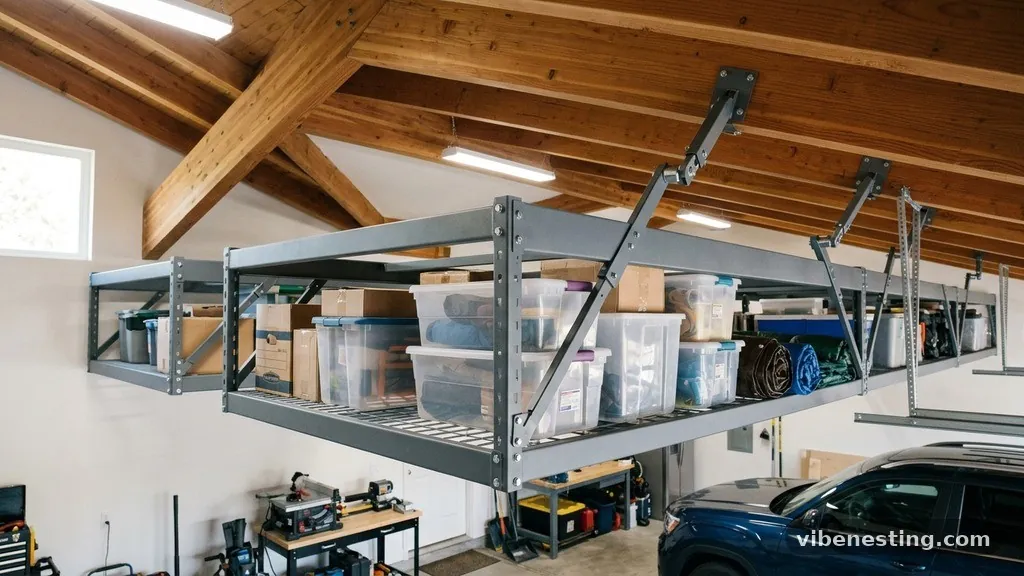
Yes, you can ceiling racks be mounted safely on vaulted or angled garage ceilings provided you use the correct mounting hardware and anchoring techniques. The primary concern is not the angle itself, but the ability of the rack to remain level while the mounting points are perpendicular to the slope.
Most heavy-duty overhead systems are designed with adjustable drop-down arms that can accommodate various pitches. You must ensure that the force exerted by the weight of your stored items is transferred directly into the structural rafters rather than the drywall or ceiling joists alone.
If you ignore the slope and attempt to force a flat-mount system onto an angled surface, you risk shearing the bolts or pulling the lag screws out of the wood. Professional-grade storage units often include pivot brackets specifically engineered for vaulted ceilings.
These brackets allow the vertical supports to hang straight down even when the mounting plate is fixed to a 30 or 45-degree angle. Always verify that the hardware kit you purchase explicitly mentions compatibility with sloped joists or trusses.
Identifying Your Ceiling Structure
Before you purchase any equipment, you must identify the type of framing supporting your garage roof. Most modern homes utilize engineered wood trusses, which are lightweight but have specific structural limitations regarding where you can drill.
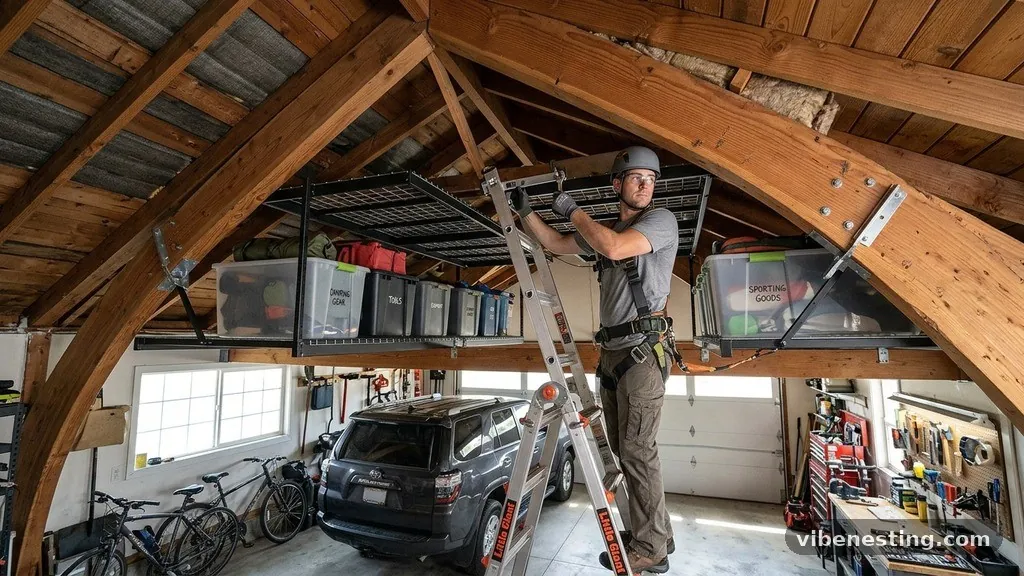
You should climb a ladder and use a flashlight to inspect the rafters or trusses in the area where you intend to mount the rack. Look for the “peak” of the roof and determine the exact pitch, as this will dictate the length of the adjustable arms you need to buy.
Avoid mounting heavy loads to the bottom chord of a truss unless you have confirmed that the truss design is rated for that specific point load. If you are unsure about the structural integrity, consult the APA – The Engineered Wood Association for guidelines on structural wood paneling and framing.
Identifying whether your ceiling is made of dimensional lumber or manufactured trusses is the most critical step in ensuring the long-term safety of your installation. Do not assume that any point on the ceiling can support the same weight as a standard flat garage joist.
Calculating Load Capacity and Distribution
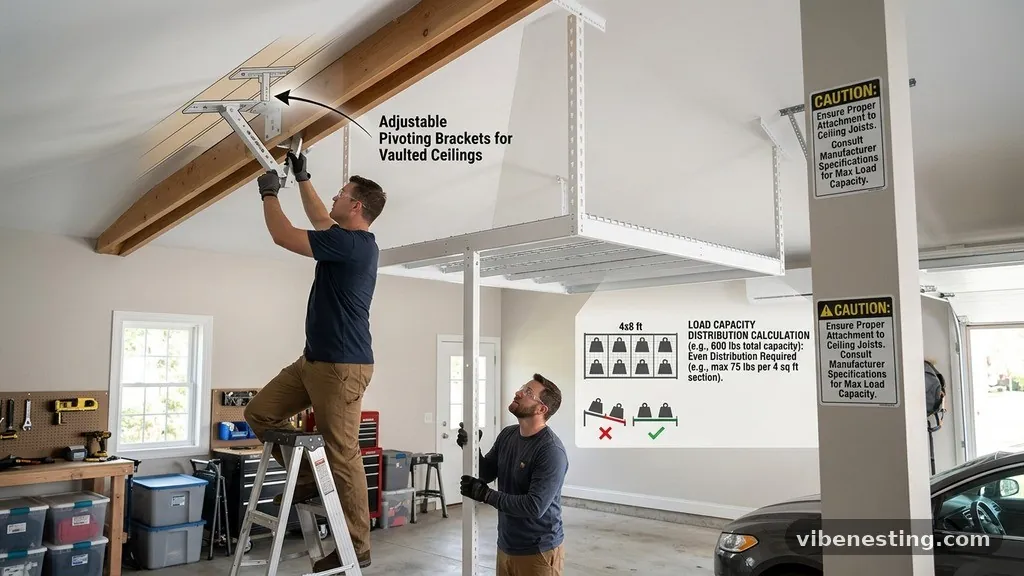
When you decide to install overhead storage, you must calculate the total weight of the items you plan to store. Most residential ceiling racks are rated for a specific number of lbs, often ranging from 250 to 600 lbs per unit.
On an angled ceiling, the distribution of that weight becomes more complex because the center of gravity might shift if the rack is not perfectly balanced. Distribute your holiday decorations and other bulky household items evenly across the platform to prevent uneven stress on the mounting hardware.
It is safer to underestimate the capacity of your rack than to push it to the limit. If a manufacturer states a 400 lbs limit, aim to keep your storage weight under 300 lbs to account for the dynamic force exerted when placing or removing items.
You should also consider the “live load” impact, which occurs when you pull on the rack to access your belongings. Jerking a heavy box off a rack creates a momentary spike in pressure that can test the integrity of your lag screws.
Required Hardware for Sloped Mounting
Standard lag bolts provided in basic kits are often insufficient for the unique stress of a vaulted installation. You should look for high-strength steel hardware that is rated for overhead lifting applications.
If the included bolts are shorter than 3 inches, discard them and purchase longer, heavy-duty lag screws that can penetrate deep into the center of the structural framing. Using oversized washers is also a mandatory practice to ensure the bolt head does not pull through the bracket during a shift in weight.
Many installers prefer to use threaded rods or specialized ceiling brackets that provide a more secure connection than standard angle iron. These components are often sold by the same manufacturers that produce the racks, but they are sometimes listed as “accessory kits” rather than standard inclusions.
By using these specialized parts, you minimize the risk of the rack swaying or shifting over time. Below is a comparison of typical mounting hardware used for different ceiling types.
| Mounting Type | Hardware Required | Best For |
|---|---|---|
| Flat Ceiling | Standard Lag Screws | Standard Joists |
| Vaulted Ceiling | Pivot Brackets & Threaded Rods | Angled Rafters |
| Concrete Ceiling | Expansion Anchors | Masonry/Slabs |
Managing the Pivot and Leveling
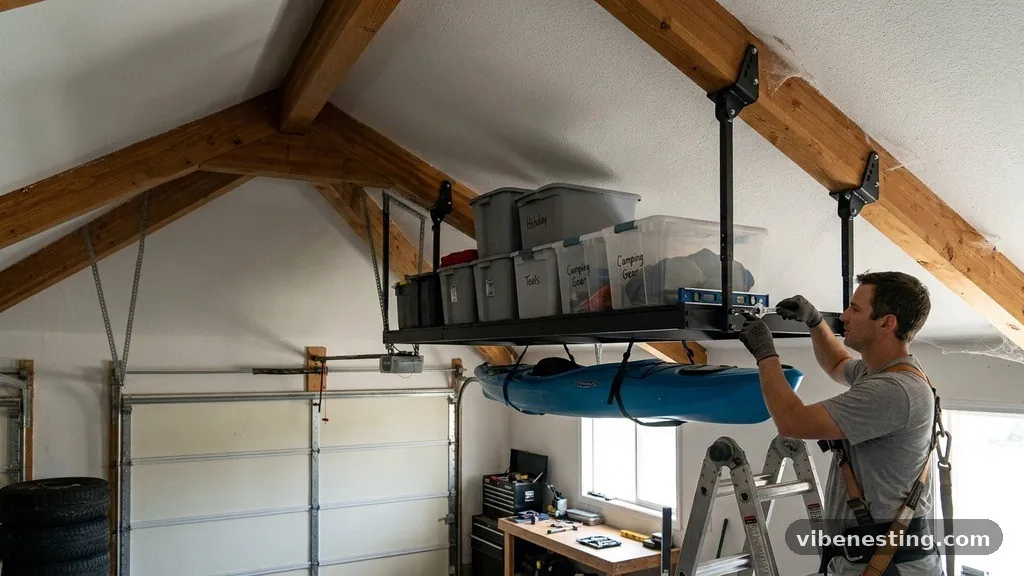
Achieving a level storage surface on an angled ceiling is a matter of precision measurement. You will need to use a high-quality bubble level or a laser level to ensure the platform is perfectly horizontal before tightening the final bolts.
If one side of the rack is lower than the other, the weight will naturally migrate toward the low side, creating an unbalanced load. This imbalance can lead to the rack warping over time or, in extreme cases, pulling out of the ceiling.
Start by installing the highest mounting point first, then use a string line to mark the corresponding locations for the lower points. It is often helpful to have a second person assist you during the leveling process to hold the platform in place while you adjust the vertical support arms.
If you find that the rack is still not perfectly level after adjustments, do not force it. Instead, check the mounting brackets for any debris or obstructions that might be preventing them from sitting flush against the rafters.
Common Risks and How to Avoid Them
One of the most frequent mistakes is mounting the rack into the drywall rather than the actual wood framing. Drywall is not designed to support overhead weight, and even a small load can cause the ceiling to buckle or collapse.
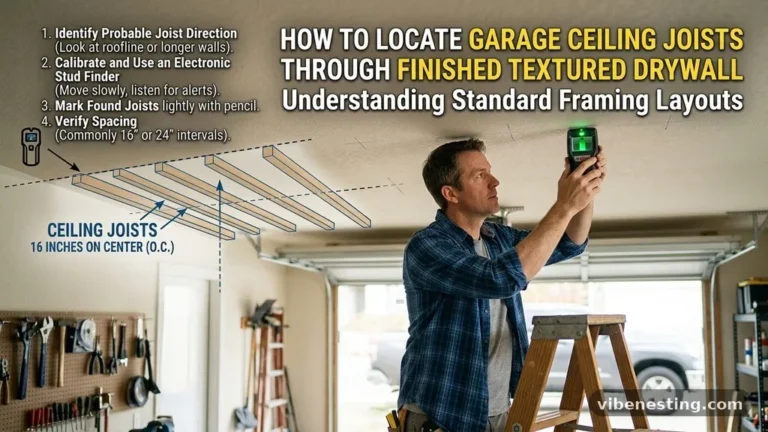
You must use a stud finder or a thin probe to locate the exact center of the rafter before drilling. Once you have located the wood, pre-drill a pilot hole to prevent the joist from splitting, which is a common issue with older, dried-out timber.
Another risk involves the use of improper fasteners that are prone to rusting or snapping under tension. Ensure that all your hardware is galvanized or zinc-plated, especially if your garage is not climate-controlled.
Humidity changes can accelerate the degradation of low-quality bolts, leading to a sudden failure of the rack system. If you notice any signs of bending or bowing in the metal components of your rack, remove the load immediately and inspect the mounting points for damage.
Best Practices for Organization
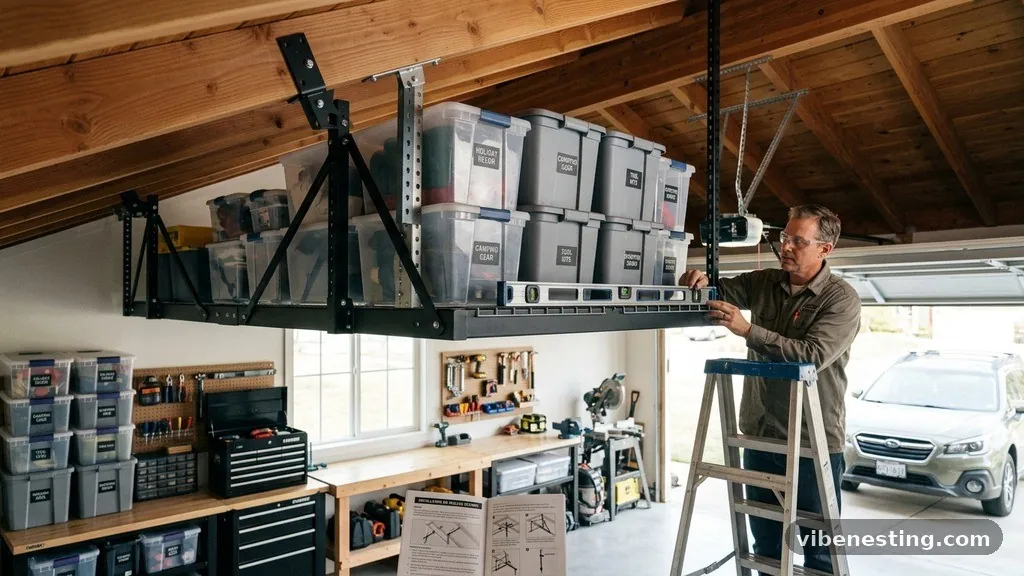
Once you have successfully installed your racks, how you store your items will determine the longevity of the system. Place heavier items toward the center of the rack, directly under the vertical supports, to minimize the leverage exerted on the ceiling brackets.
Lighter items like holiday decorations or seasonal clothing can be placed near the edges of the platform. By organizing your items by weight, you maintain the structural balance of the rack and make it easier to retrieve things safely.
Consider using clear plastic bins that allow you to identify the contents without needing to pull the entire box down. This reduces the time you spend reaching up and pulling on the rack, which in turn reduces the repetitive stress on the installation points.
Always keep a sturdy step ladder nearby to ensure you can reach the rack comfortably. Standing on a chair or a makeshift platform to access an overhead rack is a significant safety hazard that should be avoided at all costs.
- Use clear storage bins to keep items visible and organized.
- Label all bins with contents and the year they were last accessed.
- Keep heavy items on the floor and only move them to the rack if absolutely necessary.
- Avoid storing liquids or hazardous materials that could leak onto your vehicle.
- Regularly check the tightness of all bolts and nuts during seasonal changes.
The Role of Professional Installation
If you are not comfortable working with power tools or lack experience with structural framing, hiring a professional is the safest route. A contractor or a professional handyman will have the experience to identify potential issues with your roof pitch that you might miss.
They will also have the specialized tools, such as impact drivers and laser levels, to ensure the job is done right the first time. The cost of professional installation is often a small fraction of the price of the damage caused by a rack collapse.
When hiring a professional, ask them specifically if they have experience with overhead storage in vaulted garages. You can ask them to show you photos of previous installations to gauge their competency.
A good installer will be happy to explain their process for locating rafters and ensuring the load is distributed correctly. If they seem unsure about how to handle the angle of your ceiling, it is best to keep looking for a more experienced contractor.
Maintaining Your Storage System
Even a perfectly installed rack requires maintenance to ensure it remains safe over the years. At least twice a year, perform a visual inspection of every bolt, nut, and support arm.
Check for any signs of rust, bending, or loosening that could indicate the rack is under too much stress. If you live in an area with large temperature fluctuations, the wood in your ceiling may expand and contract, which can cause lag screws to loosen over time.
Tighten any hardware that feels loose, but be careful not to overtighten, as this can strip the wood fibers inside the rafter. If you ever notice the ceiling drywall cracking around the mounting points, this is a major red flag.
It suggests that the rafters are flexing under the weight or that the mounting point is pulling away from the wood. Stop using the rack immediately and have a professional evaluate the structural integrity of the ceiling.
FAQ: Common Questions About Vaulted Garage Racks
Can I use a standard storage lift on a vaulted ceiling?
Most standard storage lifts are designed for flat surfaces and will not function correctly on a slope. You should look for a model that features an adjustable motor or a mounting kit specifically designed for angles, as standard lifts rely on gravity and vertical alignment to work.
How do I find the rafters on a vaulted ceiling?
Use a magnetic stud finder to locate the screws or nails holding the drywall to the rafters. If that fails, you can use a small drill bit to test-drill in an inconspicuous area until you hit solid wood.
Does the angle of the ceiling affect the weight capacity?
Yes, the angle can change how the weight is distributed, which may effectively lower the safe working limit compared to a flat ceiling. Always defer to the manufacturer’s specific instructions for sloped installations.
What is the best way to secure the rack if the rafters are uneven?
If the rafters are not perfectly spaced or level, you may need to install a secondary frame of wood (sometimes called “cleating”) that bridges the rafters. This creates a flat, level surface to which you can mount your rack hardware.
Is it safe to hang multiple racks on one vaulted ceiling?
It is safe as long as you account for the cumulative load on the roof structure. Ensure that your total storage weight does not exceed the structural limits of your garage’s roof trusses.
Conclusion
Mounting overhead storage in a garage with a non-traditional roof is entirely possible when you follow the correct engineering principles. Whether you are dealing with a steep pitch or a subtle angle, the key to success is ensuring that every mounting point is securely anchored into the structural frame. You can ceiling racks be mounted safely on vaulted or angled garage ceilings by using pivot-capable hardware and maintaining a balanced load across the platform.
By taking the time to properly measure your rafters and verify the weight capacity of your system, you can effectively maximize your storage area. If you remain unsure about the structural capacity of your home, do not hesitate to consult a professional to ensure your installation is both secure and long-lasting.